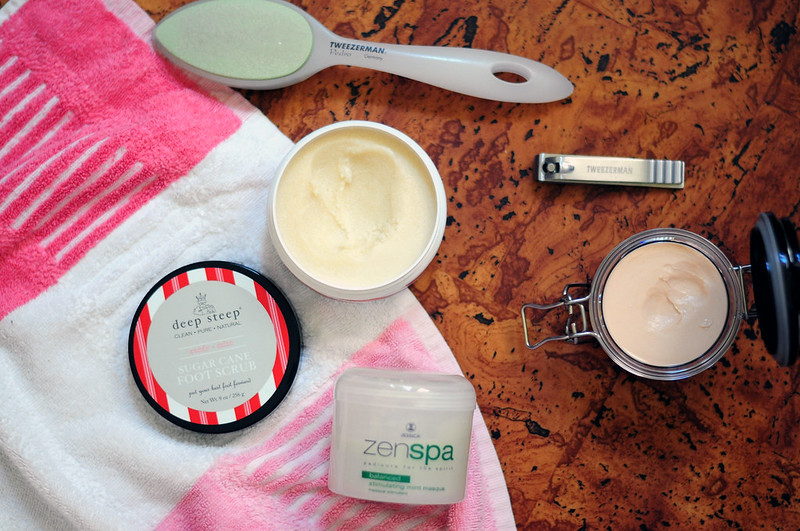
At Home Pedicure Essentials
 Step 1: Exfoliate your feet.
Either use a foot scrub or pumice stone, or both! I'm obsessed with this one from Deep Steep (£12.95). It smells incredible and almost good enough to eat, think peppermint bark. It's incredibly moisturising and the sugar cane creates a nicely abrasive scrub.
Step 2: Relax with a foot mask.
Grab a bowl of warm water, a towel, your foot mask of choice and put on a good film. I love the Jessica ZenSpa Pedicure Balanced Stimulating Mint Foot Masque (£14.55) which helps to break down dead skin cells and lock in moisture.They also sell a Cooling Ginger Foot Masque which I want to once this one is finished.
Step 3: Clip your nails.
You nails will have softened while you soaked the foot mask off so you'll easily be able to cut your nails down to your preferred length and/or shape.
Step 4: Moisturise.
Choose your favourite moisturiser and apply a generous layer. At this point you could persuade someone to give you a foot massage but if no one is around, you can always do it yourself. My favourite at the moment is The Body Shop Africa Honey & Beeswax Hands & Foot Butter (£10) which is incredibly moisturising and smells amazing.
 Step 5: Prep.
Since we've just applied a moisturiser, we now want to make sure there isn't any oil or residue on our nails as this will make the nail polish chip and flake away. Simply pour some nail polish remover onto a cotton pad and wipe over each nail. Then apply a layer of Orly Primetime (£8.95) to dehydrate the nail. This will insure the base coat adheres to the nail and will increase the longevity of your pedicure.
Step 6: Apply a base coat.
Apply a thin coat of your chosen base coat and leave plenty of drying time. I've gone for China Glaze Strong Adhesion Base Coat (£5.60).
Step 7: Choose a colour.
Since there are hints of the warmer summer months ahead of us, I've chosen a hot raspberry shade from Barry M, Pomegranate (£3.99). As with most nail polishes, I applied two thin coats of Pomegranate and made sure I left each layer to completely dry before I applied the next.
Step 8: Add a top coat.
Once your final layer of colour has dried then you can apply your topcoat. I'm using China Glaze Fast Forward Top Coat (£5.95) which dries really quickly, which you'd expect given the name, but it also makes your nails look incredibly glossy.
Step 9: Clean up.
This is the step that will make your pedicure look more professional and less DIY. If you're not the neatest at applying nail polish, don't worry. Simply pour a bit of nail polish remover into the lid and use a thin brush to wipe away and neaten up the edges of your nail polish. If you've gone a bit too close to your cuticles then this is the perfect time to even it all out.
Step 10 : Apply a cuticle oil.
Step nine can be a bit drying so apply a good amount of cuticle oil (£8.99) and massage it in. Go gently though just in case your manicure isn't fully dry.


Comments
Post a Comment